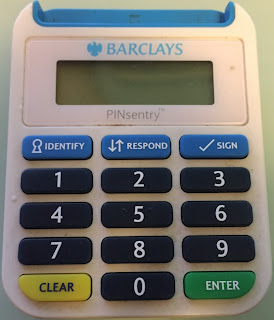
Barclays PINsentry
Hey guys, insidetech here and today I will be looking at the inside of a Barclays PINsentry. Hope you enjoy the post and there will be more on the way.
We first see the front panel.

After turning it around we are met with a single screw,

However after a little bit of searching other screws can be easily found,
1) top left hand corner hidden under a rubber foot

2) top right hand corner hidden under another rubber foot

3) hidden under the silver sticker in the centre

4) the screw that is very visible at the bottom (not putting a picture of this as you should be able to find it).
After removing all screws that are visible and the bottom panel we are shown the batteries and two more screws
1) in the bottom left

2) in the bottom right

After unscrewing these final screws and removing the back panel (this will require some force), we can see some PCB and more protective plastic.

This plastic comes off in two layers. The top layer require the removal of the top screws, left and right, and the bottom screws, also left and right.
The bottom layer only requires the removal of the middle screws, left and right, as we have already removed the top screws.

With the removal of all the blue plastic we can finally see the whole PCB and LCD screen, this comes out of the white plastic very easily it is not attached via screws at this time.

When we turn this over we can see tracks were the button presses would allow the current to flow over and thus creating an input which would be soon become something we can see on the LCD screen.
All thats left in the casing are the rubber buttons
With that being that last thing out of the case I would say that that would conclude this weeks, what's inside our technology.
Here's one last look at everything that was inside,


No comments:
Post a Comment